Write Guitar Solos using notes from Chords – Beginning Guitar Solo Techniques Part 1
Beginning Guitar Solo Techniques | Basic Chordal Approach Part 2
If you know the chord progression, then you can use the notes from those chords to make simple guitar solos or as the basis for more complex guitar solo ideas.
For Part 2 we are expanding our chord groups further up the neck.
We are using the exact same process we used in Part 1. If you haven’t seen part 1 then check it out here:
We are using the same chord progression as part 1.
| D | C | G | D |
Our First step is to turn all of our “Cowboy” chords into barre chords.
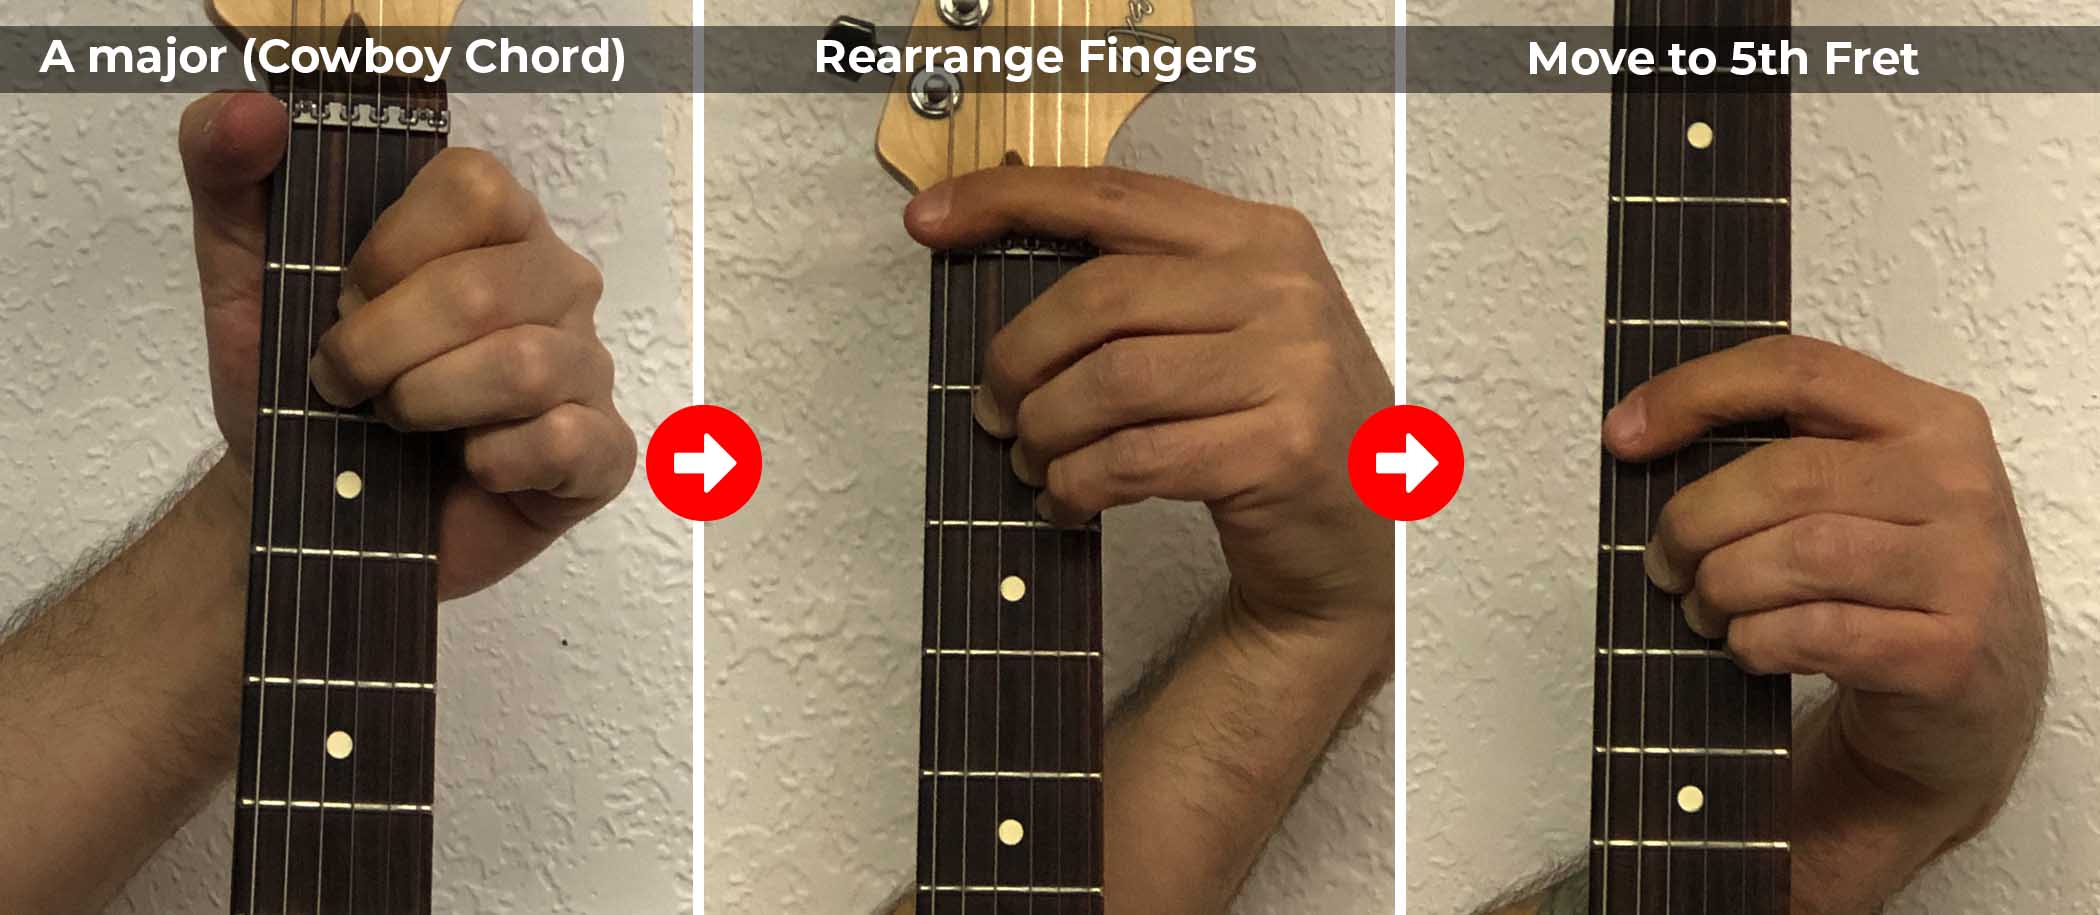
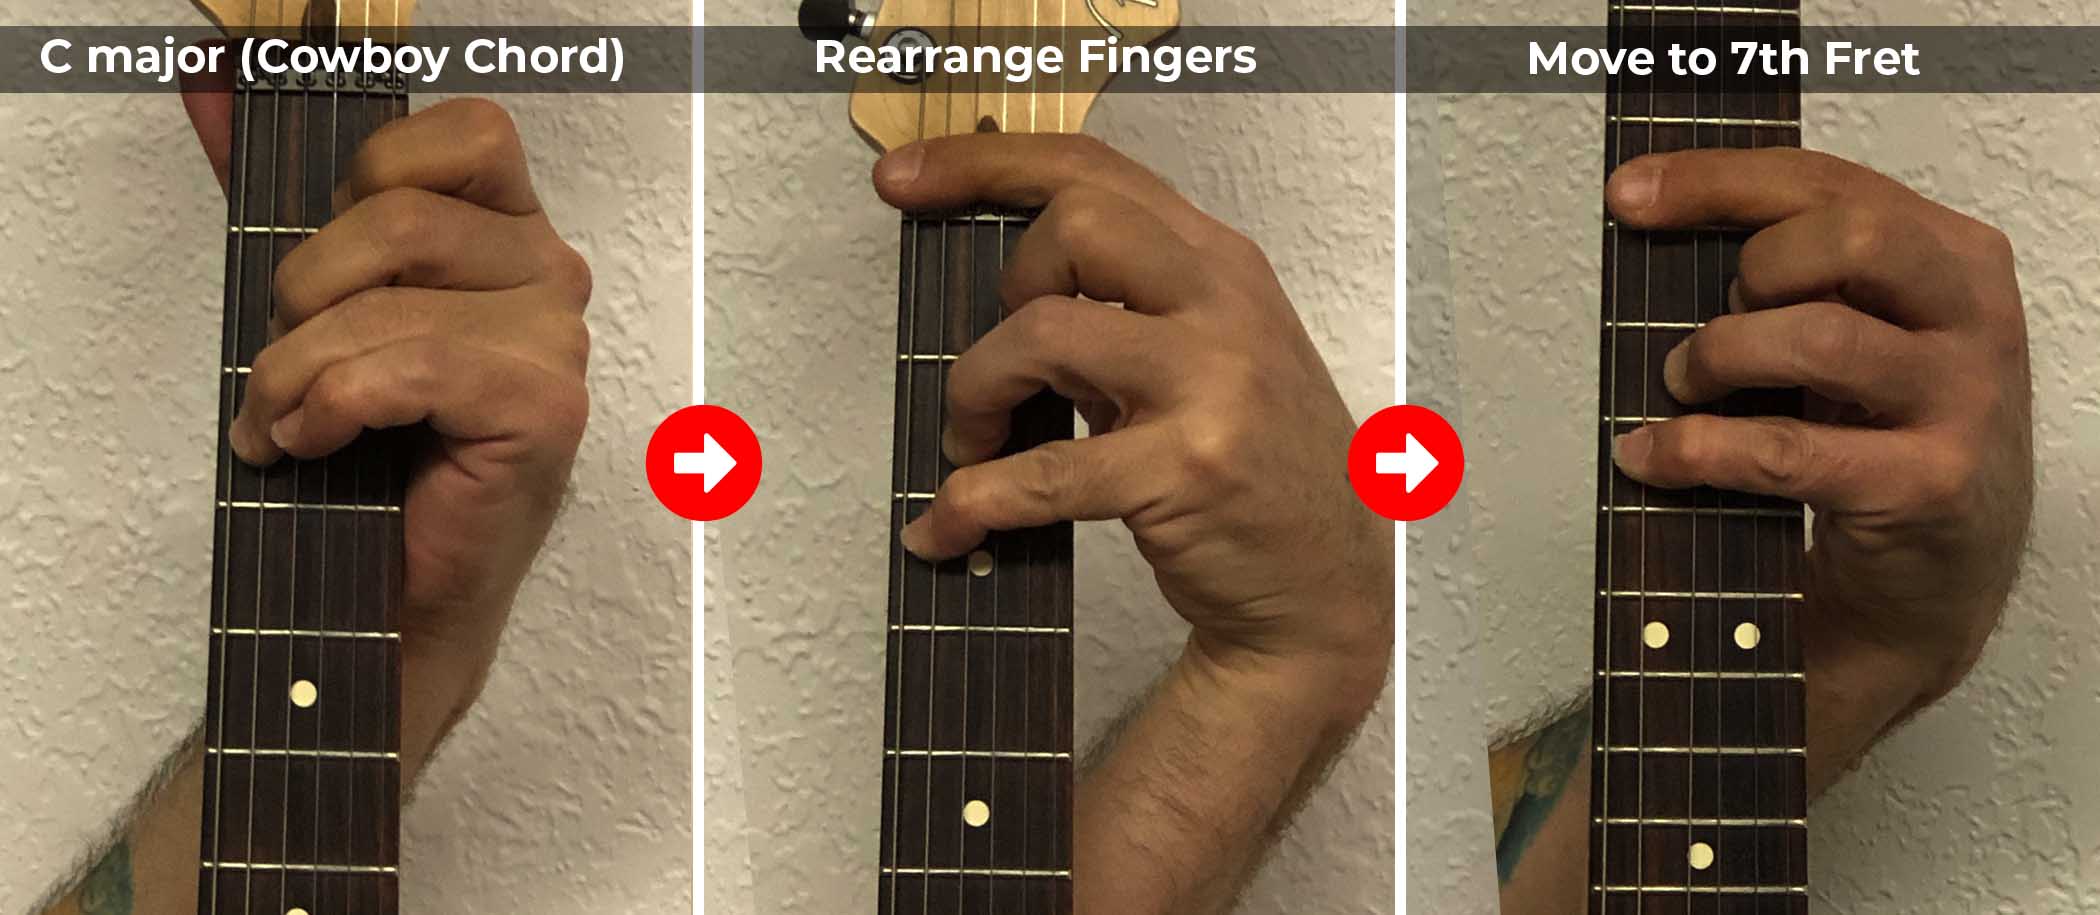
The first cowboy chord we are going to change is the D major chord. We start with an A shape. Rearrange our fingers as if there were a fret above the nut of the guitar so our first finger acts as a barre across the strings. Then we shift that whole shape to the 5th fret. (See Example 1)
Example 1
How to make the D major barre chord.
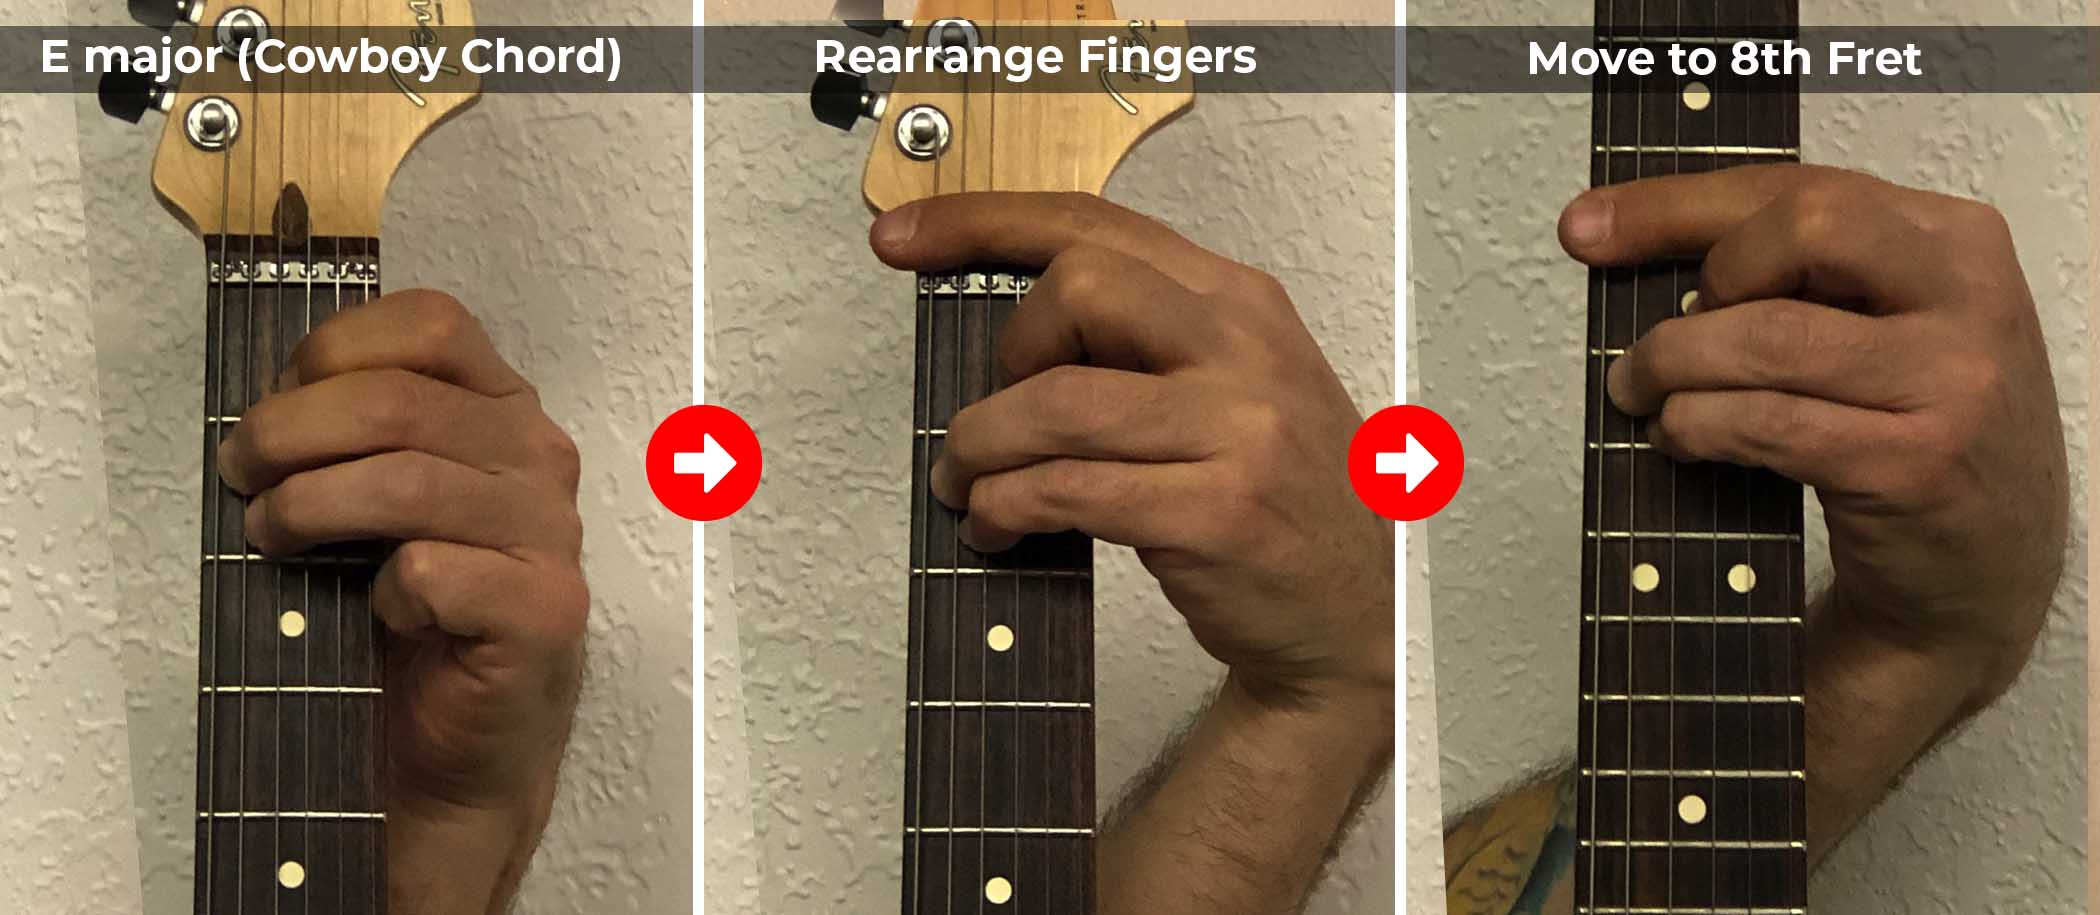
Now we will do the same for the “C” cowboy chord. We will start with an “E” cowboy chord, then rearrange our fingers so our first finger can act like a barre across all the strings. Now move that shape up to the 8th fret. (See Example 2)
Example 2
How to make the C major barre chord.
Finally we will do the same for our last cowboy chord, “G”. We start with a “C” shape, then rearrange our fingers to allow the first finger to act as a barre. Then we will move that entire shape to the 7th fret. (See example 3)
Example 3
How to make a G major barre chord.
From here we will make our chord groups like we did previously simply pulling notes out of the chord. For the first group of notes from each chord we will use the 4th, 3rd and 2nd string notes. For the second group we will use the 3rd, 2nd and 1st string notes from the chords.
With these groups we can start to give our brains something easier to remember and we can work on getting this information into our muscle memory.
Here are the groups for all 3 chords. (See example 4)
Example 4

If you have worked on the Part 1 lesson, then you should notice that the chord group “shapes” should be somewhat familiar to you.
These “shapes” (the 3 note groups make a shape on the chord diagram and perhaps to your eye as well on the guitar fretboard), are the same shapes from part 1.
We’ve just moved the shapes to other parts of the guitar neck. This will give us more options for our solos. Over time you may start to discover that the 3 note chord groups occur in predictable patterns for every basic chord across the neck.
The brain will spot the “shape” of a chord group more readily than trying to recall a whole series of notes across the neck.
I have created a practice loop for you to use in the “Part 2” YouTube video. The link to that spot in the video is below.